Getting Started with DIY Solar: A Complete Beginner's Guide
Key Takeaways
- DIY solar costs $1.50-$2.00/watt vs. $3-$4/watt for professional installation — that’s $3,000-$6,000 saved on a typical 5kW system.
- Every system has four core parts: solar panels, charge controller, battery bank, and inverter. Understanding each one prevents expensive mistakes.
- LiFePO4 batteries dominate DIY builds in 2026 — they cost more upfront but last 8-10x longer than lead-acid, making them cheaper per cycle.
- Start by calculating your daily kWh usage, then size panels, batteries, and inverter around that number. Our Solar System Sizer does the math for you.
- 48V systems are the sweet spot for most residential DIY builds — lower current means smaller wire, fewer losses, and cheaper components.
- You don’t need to power your entire house to get started. A partial system covering essentials (fridge, lights, router) is a realistic first project.
Why Build Your Own Solar System?
The math is straightforward. A professionally installed 5kW residential solar system runs $15,000-$20,000 in 2026. The same system, purchased as components and installed yourself, costs $7,500-$10,000. That’s real money back in your pocket — and the federal solar tax credit (ITC) applies either way, knocking another 30% off.
If you’re not sure whether to build from components or just buy a plug-and-play unit, our portable power stations vs DIY comparison lays out when each approach makes sense. But cost savings aren’t the only reason I build my own systems. When something goes wrong at 2 AM during a storm — and eventually it will — I know exactly which breaker to flip, which fuse to check, and which connection to inspect. That kind of ownership matters when your freezer full of food is on the line.
My first build was a small system on my shed — a couple panels, a basic MPPT controller, a single 100Ah LiFePO4 battery, and a 1000W inverter. It ran my shop lights, a radio, and charged my power tool batteries. Nothing fancy. But it taught me more about solar in a weekend than months of reading forums ever did.
That shed system is still running. Meanwhile, I’ve built larger systems and helped others do the same. Each one got easier because I understood the fundamentals from that first small build.
Who Should (and Shouldn’t) DIY
DIY solar is a great fit if you’re comfortable with basic electrical work — think swapping outlets, running wire through conduit, reading a multimeter. You don’t need to be an electrician, but you do need to respect electricity.
If you’ve never touched a wire in your life, start with a small portable system (under 500W) where the voltages are low and the consequences of mistakes are minor. Work your way up.
Where you should absolutely hire a professional: any grid-tied interconnection work. Tying into your utility panel involves your main service entrance, and in most jurisdictions, that requires a licensed electrician and inspection. More on that in the safety section below.
The Four Core Components
Every solar power system — whether it’s a 200W van setup or a 20kW whole-home installation — uses the same four building blocks.
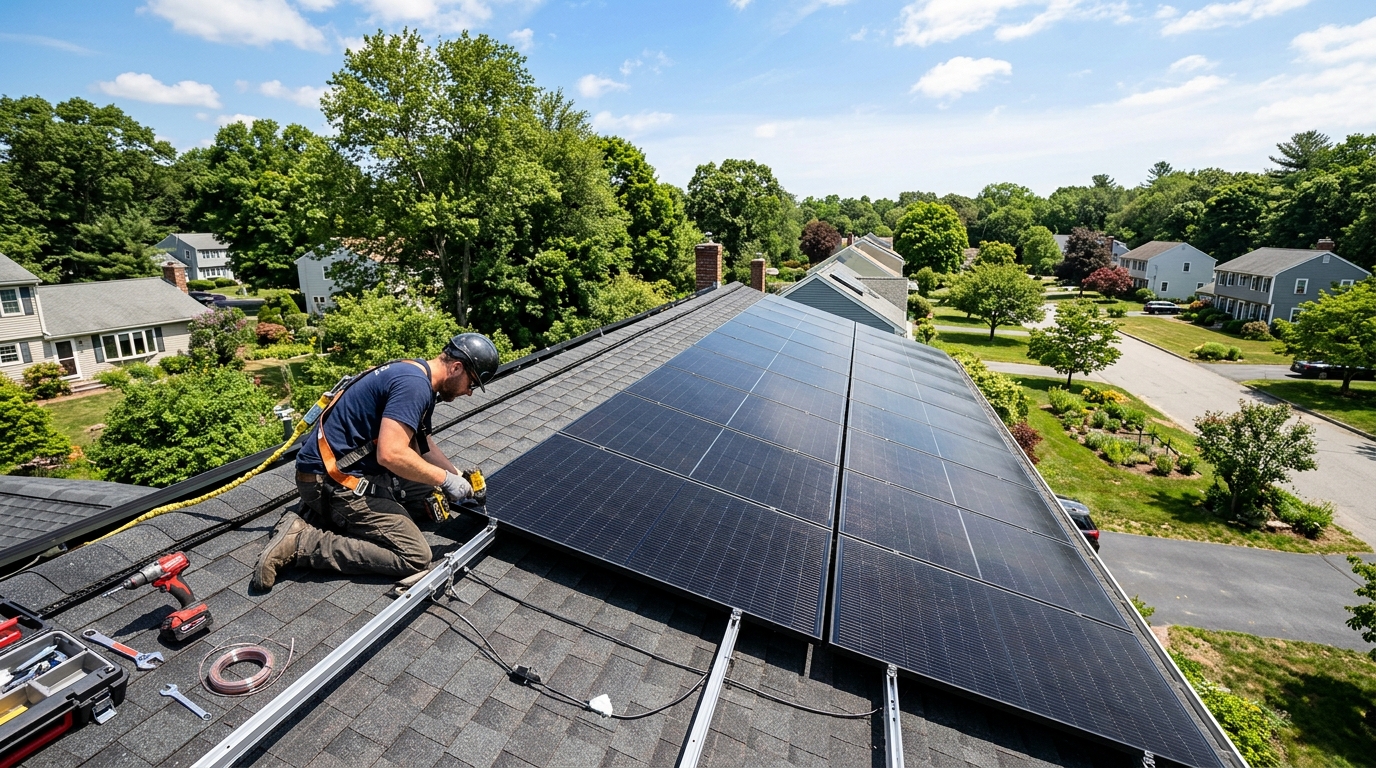
1. Solar Panels
Panels convert sunlight into DC electricity. In 2026, you’ll mostly see monocrystalline panels in the 400-550W range for residential use. Prices have dropped to roughly $0.30-$0.50/watt for quality Tier 1 panels.
How to choose: For a roof mount, higher wattage panels (450W+) make sense because you’re limited on space. For ground mounts where space isn’t tight, you can save money with slightly lower wattage panels. Look for panels with at least a 25-year performance warranty and a temperature coefficient below -0.35%/degC.
On my roof, I run higher-wattage panels where space is limited. For ground mounts where there’s room, slightly lower wattage panels can save you $30-50 per panel — an easy call when you have the space.
If your panels aren’t performing as expected after installation, check our troubleshooting guide for low panel output.
2. Charge Controller
The charge controller sits between your panels and batteries. It regulates the voltage and current flowing into the battery bank, preventing overcharging and optimizing energy harvest.
There are two types:
- PWM (Pulse Width Modulation): Cheap, simple, but wastes energy when panel voltage is much higher than battery voltage. Fine for small systems where panels and batteries are voltage-matched.
- MPPT (Maximum Power Point Tracking): Costs more, but harvests 15-30% more energy by converting excess panel voltage into additional charging current. Worth it for any system over 400W.
How to choose: Get MPPT. Seriously. The efficiency gain pays for the price difference within months. Size your controller so its maximum input voltage and current ratings exceed your panel array’s open-circuit voltage (Voc) and short-circuit current (Isc), with at least a 20% safety margin on voltage. Our MPPT charge controller sizing and install guide walks through the full math, and the best MPPT charge controllers for 2026 roundup covers which specific units are worth buying.
3. Battery Bank
Batteries store the energy your panels produce during the day so you can use it at night, during clouds, or during a grid outage. Battery selection is one of the biggest decisions in your build — I cover chemistry choices in detail below.
How to choose: Start with your daily energy needs, then size the bank so you never regularly discharge below 20% state of charge (for LiFePO4). For off-grid systems, plan for 2-3 days of autonomy. Our Battery Bank Calculator walks you through the sizing math.
4. Inverter
The inverter converts DC power from your batteries (or directly from panels in grid-tied systems) into AC power that runs your household appliances.
Key specs to watch:
- Continuous wattage: Must handle your total running load. A 5kW inverter can supply 5,000 watts continuously.
- Surge wattage: Must handle startup surges from motors (fridge compressor, well pump, AC unit). Look for 2x continuous rating.
- Output waveform: Pure sine wave only. Modified sine wave inverters are cheaper but can damage electronics and make motors run hot.
- Transfer switch: If you want grid backup, look for inverters with a built-in automatic transfer switch (ATS).
The best decision I made was going with a 48V inverter — the EG4 6000XP specifically. For a full roundup of hybrid inverter options, see our best all-in-one solar inverters for 2026. At 48V, a 6kW load only draws 125 amps, compared to 500 amps at 12V. That means smaller cables, smaller fuses, less voltage drop, and less heat. For any system over 3kW, go 48V.
System Types: Off-Grid vs. Grid-Tied vs. Hybrid
Before you buy a single component, decide what type of system you’re building. Each serves different goals.
Off-Grid
Your system is your only power source. No utility connection at all.
Pros: Complete energy independence. No electric bill. Works anywhere — cabins, RVs, remote properties. No utility permission or interconnection paperwork.
Cons: You must size for worst-case conditions (winter, cloudy weeks). Requires a larger battery bank and often a backup generator. No safety net if you undersize. Our off-grid solar system sizing guide walks through worst-case sizing math step by step.
Best for: Remote properties without utility access, cabins, mobile setups, or anyone who wants total independence. If your “mobile setup” is a camper, our RV and van solar build guide covers the specific considerations for vehicles.
Grid-Tied (No Battery)
Panels feed power through a grid-tie inverter directly into your home and the utility grid. No batteries at all.
Pros: Simplest system. Lowest cost. Net metering credits offset your bill. Highest ROI because batteries are the most expensive component.
Cons: Zero backup during outages — when the grid goes down, your system shuts off for safety (anti-islanding). You’re still dependent on the utility.
Best for: Maximizing financial return, reducing your electric bill, areas with strong net metering policies.
Grid-Tied with Battery Backup (Hybrid)
The best of both worlds. Your system connects to the grid for net metering but also has a battery bank that kicks in during outages.
Pros: Electric bill reduction plus backup power. Can prioritize self-consumption (use your own solar first, buy grid power only when needed). The grid acts as your “infinite battery” for surplus.
Cons: Most expensive option. More complex wiring and controls. May require a critical loads subpanel.
Best for: Homeowners who want bill savings and power security. This is what most people building a 2026 home system should seriously consider.
My house runs a hybrid setup. Day to day, I export surplus solar to the grid and get net metering credits. When the power goes out — which happens 4-5 times a year in my area — the batteries keep the fridge, internet, lights, and my home office running without interruption. For a deeper dive into designing this kind of setup, see our grid-tied battery backup guide.
Sizing Your System Step by Step
This is where most beginners either overthink or underthink. Here’s the process I follow for every build.
Step 1: Calculate Your Daily Energy Use
Pull your electric bill. Find your monthly kWh usage, then divide by 30. The average US household uses about 30 kWh/day, but your number might be 15 or 50 — use your actual data.
If you’re building an off-grid system for a new property, list every appliance and its wattage, estimate hours of daily use, and multiply. A fridge uses about 1.5-2 kWh/day. LED lights, maybe 0.5 kWh total. A window AC unit, 3-5 kWh/day. Add it all up.
Our Solar System Sizer automates this calculation and factors in your location’s sun hours.
Step 2: Size Your Panel Array
Take your daily kWh target and divide by your location’s peak sun hours (PSH). In the southern US, that’s 5-6 hours. In the northeast, expect 3.5-4.5 hours. You can look up your exact PSH on the PVWatts calculator from the National Laboratory of the Rockies, or follow our solar panel sizing guide for a full worked example.
Example: 10 kWh/day / 5 PSH = 2,000W of panels needed.
But panels don’t perform at rated wattage in real conditions. Dust, heat, wiring losses, and non-optimal angles reduce output by 15-25%. I always apply a 1.25x derate factor:
2,000W x 1.25 = 2,500W of panels.
That’s six 420W panels, or five 500W panels. Round up — extra panel capacity is cheap insurance.
Step 3: Size Your Battery Bank
For off-grid, I size batteries to cover 2-3 days without sun (autonomy days):
10 kWh/day x 2 days = 20 kWh of usable capacity.
LiFePO4 batteries can safely use 80% of their rated capacity, so:
20 kWh / 0.80 = 25 kWh total battery capacity.
At 48V, that’s about 520Ah of battery (25,000Wh / 48V). Four server-rack 48V 100Ah batteries, or two big 48V 200Ah units. Check our best LiFePO4 batteries roundup for current recommendations.
For grid-tied with backup, you need far less — just enough to cover your critical loads for 8-12 hours. A single 48V 200Ah (10 kWh) battery often does the job.
Step 4: Size Your Inverter
Your inverter must handle your peak simultaneous load. Add up the wattage of everything that could run at the same time, then add 20-25% headroom.
If your peak load is 4,000W, get a 5,000W inverter. If you have large motor loads (well pump, central AC), make sure the inverter’s surge rating can handle the startup spike — typically 3-5x the running wattage for the first few seconds.
Choosing Battery Chemistry
This decision affects cost, lifespan, performance, and safety. Here’s how the three main options compare in 2026.

LiFePO4 (Lithium Iron Phosphate)
| Spec | Value |
|---|---|
| Cost per kWh | $150-$250 |
| Cycle life | 3,000-6,000+ cycles |
| Usable capacity | 80-90% of rated |
| Round-trip efficiency | 95-98% |
| Weight | ~30 lbs per kWh |
| Self-discharge | 2-3% per month |
| Maintenance | None |
The best choice for almost every DIY build. LiFePO4 is the most thermally stable lithium chemistry — no risk of thermal runaway. It handles partial state-of-charge well, doesn’t need equalization charging, and lasts 10-15 years in typical use. Prices have dropped 40% since 2024.
If you want to build your own battery from cells, see our DIY LiFePO4 battery bank guide.
AGM Lead-Acid
| Spec | Value |
|---|---|
| Cost per kWh | $150-$200 |
| Cycle life | 300-500 cycles |
| Usable capacity | 50% of rated |
| Round-trip efficiency | 80-85% |
| Weight | ~75 lbs per kWh |
| Self-discharge | 3-5% per month |
| Maintenance | None (sealed) |
AGM looks cheap upfront, but the math tells a different story. You can only use 50% of rated capacity (vs. 80% for LiFePO4), so you need twice the rated kWh. And with 300-500 cycle life, you’ll replace the bank every 2-3 years. Over 10 years, AGM costs 3-4x more than LiFePO4.
I only recommend AGM for very small systems (under 500Wh) or as a learning battery where you don’t mind replacing it later.
NMC/Li-ion (Nickel Manganese Cobalt)
| Spec | Value |
|---|---|
| Cost per kWh | $100-$200 |
| Cycle life | 1,000-2,000 cycles |
| Usable capacity | 80-90% of rated |
| Round-trip efficiency | 90-95% |
| Weight | ~20 lbs per kWh |
| Self-discharge | 2-3% per month |
| Maintenance | None |
NMC packs more energy per pound than LiFePO4, which is why Tesla Powerwalls and EV batteries use it. However, NMC has a higher thermal runaway risk and requires more sophisticated battery management. For DIY, LiFePO4’s safety margin makes it the better choice unless weight is your primary concern (van builds, portable systems).
Wiring Fundamentals
Wiring mistakes are the #1 cause of system fires and component damage. Even on a beginner build, take this section seriously.
Series vs. Parallel
Series connections add voltage while keeping current the same. Two 12V 100Ah batteries in series = 24V 100Ah.
Parallel connections add current (capacity) while keeping voltage the same. Two 12V 100Ah batteries in parallel = 12V 200Ah.
For panels, series strings increase voltage (needed for MPPT charge controllers), while parallel connections increase current. Most residential systems use a combination — panels wired in series strings, with multiple strings wired in parallel.
We have a full walkthrough with diagrams in our solar panel wiring guide.
Wire Sizing Matters More Than You Think
Undersized wire causes voltage drop, wasted energy, and heat buildup that can melt insulation or start fires. The right wire size depends on three factors:
- Current (amps) — higher current requires thicker wire
- Distance (one-way run length) — longer runs need thicker wire
- Acceptable voltage drop — aim for under 3% on any run
On a 12V system running 30 amps over a 15-foot cable run, you need 4 AWG wire. The same 30 amps at 48V only needs 10 AWG because the current is four times lower for the same power. This is another reason 48V systems are easier and cheaper to build.
Use our Wire Gauge Calculator to get exact sizing for your runs, and reference the solar wire gauge chart for quick lookups.
Key Wiring Rules
- Use stranded copper wire, not solid, for all DC runs. Stranded wire handles vibration and flex without breaking.
- Fuse every positive wire at the source. Battery-to-inverter cable gets a fuse at the battery. Panel string gets a fuse at the combiner box. Our solar fuses and breakers guide covers NEC sizing rules in detail.
- Keep DC cable runs as short as possible. Mount your charge controller and inverter close to the battery bank.
- Use appropriately rated connectors. MC4 connectors for panel connections, heavy-duty lugs with heat shrink for battery cables.
- Color code everything. Red for positive, black for negative. Label both ends of every cable.
Safety and Code Compliance
Solar systems produce real power. A 48V battery bank can deliver hundreds of amps — enough to weld metal, start fires, or cause serious burns. Respect the energy you’re working with.
NEC Requirements
The National Electrical Code (NEC) — specifically Articles 690 (Solar PV) and 706 (Energy Storage) — governs solar installations in the US. Key requirements include:
- Rapid shutdown: Grid-tied systems must be able to reduce conductor voltage to safe levels within 30 seconds of shutdown initiation (NEC 690.12).
- Disconnect switches: Every energy source (panels, batteries, grid) needs a clearly labeled disconnect accessible to first responders.
- Overcurrent protection: Every ungrounded conductor must be fuse or breaker protected.
- Grounding: Equipment grounding and, for some systems, system grounding per NEC 690.41-690.47.
- Wire sizing and conduit: Must meet NEC ampacity tables with appropriate derate factors for conduit fill and ambient temperature.
Permits
Most jurisdictions require a permit for any permanently installed solar system. Grid-tied systems almost always require permits plus a utility interconnection agreement. Some areas exempt small off-grid systems (under 1kW or under a certain voltage), but check your local authority having jurisdiction (AHJ) before assuming.
The permit process typically involves submitting a system design (single-line diagram, equipment specs, site plan), passing a rough inspection of mounting and wiring, and passing a final inspection before interconnection.
When to Hire an Electrician
Even experienced DIYers should bring in a licensed electrician for:
- Main panel work: Connecting a grid-tied system to your breaker panel, installing a backfeed breaker, or adding a critical loads subpanel.
- Utility interconnection: The meter socket and service entrance are the utility’s territory and your jurisdiction’s.
- Permit-required inspections: In some areas, a licensed electrician must sign off on the installation even if you did the work. Check local rules.
I do all my own DC wiring, mounting, and component installation. For the AC side — from the inverter output to the breaker panel — I hire my electrician. It costs $500-$800 and it means my system is code-compliant with no gray areas.
Cost Breakdown: A Realistic 2026 DIY System
Here’s what a 5kW hybrid system (grid-tied with battery backup) actually costs in component prices as of early 2026:
| Component | Spec | Cost |
|---|---|---|
| Solar panels | 12x 420W monocrystalline | $1,800-$2,400 |
| MPPT charge controller | 80A 48V | $400-$600 |
| Inverter/charger | 6kW 48V hybrid (e.g., EG4 6000XP) | $1,200-$1,600 |
| Battery bank | 2x 48V 100Ah LiFePO4 (10 kWh) | $1,600-$2,400 |
| Mounting hardware | Roof or ground mount rails, clamps | $500-$800 |
| BOS (balance of system) | Wire, conduit, breakers, disconnects, fuses, combiner box | $400-$700 |
| Electrician (AC connection) | Panel work + interconnection | $500-$800 |
| Permit fees | Varies by jurisdiction | $100-$500 |
| Total before incentives | $6,500-$9,800 | |
| After 30% ITC | $4,550-$6,860 |
At the professional-install rate of $3-$4/watt, this same 5kW system would run $15,000-$20,000 before the tax credit. The DIY savings are $5,000-$13,000 depending on your component choices.
Use our Cost Estimator tool to build a custom quote for your specific system size and component preferences.
Common Beginner Mistakes
I’ve made several of these. Learn from my experience instead of repeating them.
1. Undersizing the battery bank. Everyone does this on their first build. Running your batteries below 20% SOC regularly kills cycle life. Size for realistic usage plus a buffer, not best-case scenarios.
2. Ignoring voltage drop. A 12V system with long cable runs is a recipe for frustration. I lost nearly 1V over a 20-foot run on my first build because I used 10 AWG wire where I needed 4 AWG. That’s an 8% loss — pure waste. Use the Wire Gauge Calculator.
3. Buying cheap components from unknown brands. Especially inverters and batteries. A no-name inverter that catches fire isn’t a bargain. Stick with established brands (EG4, Victron, Sol-Ark, Growatt for inverters; EG4, SOK, Redodo, Ampere Time for batteries).
4. Not planning for expansion. Size your charge controller, inverter, and wire runs for the system you’ll eventually want, not just what you’re installing today. Upgrading an undersized charge controller six months later means buying the right one twice.
5. Skipping the disconnect switches. Every source (panels, batteries, grid) needs a clearly labeled disconnect. This isn’t just code — it’s how you safely service your system and how first responders shut it down in an emergency.
6. Mixing battery types or ages. Never combine LiFePO4 with lead-acid. Never add new batteries to an old bank of the same chemistry. Mismatched batteries develop imbalances that reduce capacity and can damage cells.
7. Mounting panels flat. Even a 10-degree tilt makes a significant difference in self-cleaning (rain washes off dust and pollen) and energy production. Ideally, tilt angle should roughly equal your latitude.
8. Forgetting about snow and wind loads. Your mounting system needs to handle local conditions. Check your area’s design wind speed and snow load requirements before selecting mounting hardware.
Next Steps
You’ve got the knowledge foundation. Here’s how to move forward:
-
Size your system — Run your numbers through the Solar System Sizer. Input your location, daily usage, and system type to get panel, battery, and inverter recommendations.
-
Plan your wiring — Use the Wire Gauge Calculator to determine cable sizes for every run in your system. Reference the solar wire gauge chart while you’re shopping for cable.
-
Design your battery bank — The Battery Bank Calculator helps you determine how many batteries you need and whether to wire them in series, parallel, or both. Read the DIY LiFePO4 battery bank guide if you’re building from bare cells.
-
Estimate your costs — Plug your component choices into the Cost Estimator and factor in the 2026 federal tax credit to see your net investment.
-
Understand your wiring options — Read Solar Panel Wiring: Series vs. Parallel before you start connecting panels.
-
Pick your batteries — Browse our best LiFePO4 batteries for 2026 roundup for tested recommendations, or read the EG4 6000XP review if you’re considering that inverter.
Start small if the full system feels overwhelming. A single panel, a charge controller, one battery, and a small inverter — that’s a functional solar system you can build in an afternoon. Everything you learn on that small build applies directly when you scale up.
The best time to start was five years ago. The second best time is this weekend.
Frequently Asked Questions
How much does a DIY solar system cost in 2026?
A typical 5kW DIY solar system costs $6,500-$9,800 before the 30% federal tax credit, bringing the net cost to $4,550-$6,860. Professional installation for the same system runs $15,000-$20,000, so DIY saves you $5,000-$13,000.
Can I install solar panels myself legally?
In most US jurisdictions, homeowners can install their own solar panels. You will need a building permit and typically an electrical inspection. Grid-tied systems almost always require a licensed electrician for the utility interconnection and main panel work.
What are the four main components of a DIY solar system?
Every solar system has four core parts: solar panels (convert sunlight to DC electricity), a charge controller (regulates charging), a battery bank (stores energy), and an inverter (converts DC to AC for household use).
Should I choose 12V, 24V, or 48V for my solar system?
For most residential DIY builds over 3kW, 48V is the best choice. Higher voltage means lower current, which allows smaller and cheaper wiring, reduces energy losses, and gives access to better inverter options.
Do I need an electrician for DIY solar?
You can handle the DC wiring, panel mounting, and component installation yourself. Hire a licensed electrician for main panel work, grid interconnection, and the critical loads subpanel. This typically costs $500-$800 and ensures code compliance.
Anthony
Solar homeowner, EV driver, and DIY builder. Using solar to power a large part of my home.
Get build guides in your inbox
Weekly solar builds, product tests, and technical deep-dives.
Subscribe Free