DIY Solar for Your RV or Van: A Complete Build Guide
Key Takeaways
- Mobile solar systems face unique challenges — vibration, limited roof space, weight limits, and 12V appliance compatibility — that residential builds don’t deal with.
- Most vans run 200-800W of panels with a 200-400Ah LiFePO4 battery bank. RVs with AC units need 400-1600W and 400-800Ah.
- Rigid panels outperform flexible panels in every measurable way except weight. Flexible panels degrade faster, run hotter, and produce less power. Use them only when rigid panels physically won’t fit.
- A 200Ah LiFePO4 battery at 12V provides roughly 2.4 kWh of usable energy — enough to run a fridge, LED lights, a laptop, and a fan for a full day.
- Shore power hookup and a DC-DC charger from the alternator give you charging redundancy for cloudy stretches and driving days.
Why Mobile Solar Is a Different Animal
If you’ve built a residential solar system — or even just read our getting started guide — you might think van or RV solar is just a smaller version of the same thing. It’s not. The constraints are fundamentally different.
On a house, you have unlimited roof space relative to your needs, no weight concerns, no vibration, and you run everything at 120/240V AC. In a van, you’ve got maybe 60 square feet of roof, every pound matters for fuel economy, the entire system bounces down the highway at 65 mph, and most of your loads run on 12V DC.
Building mobile solar systems for vans and RVs taught me more about wire management, connector selection, and heat management than any amount of residential work. Things that are “good enough” on a house will rattle apart or melt in a vehicle within months.
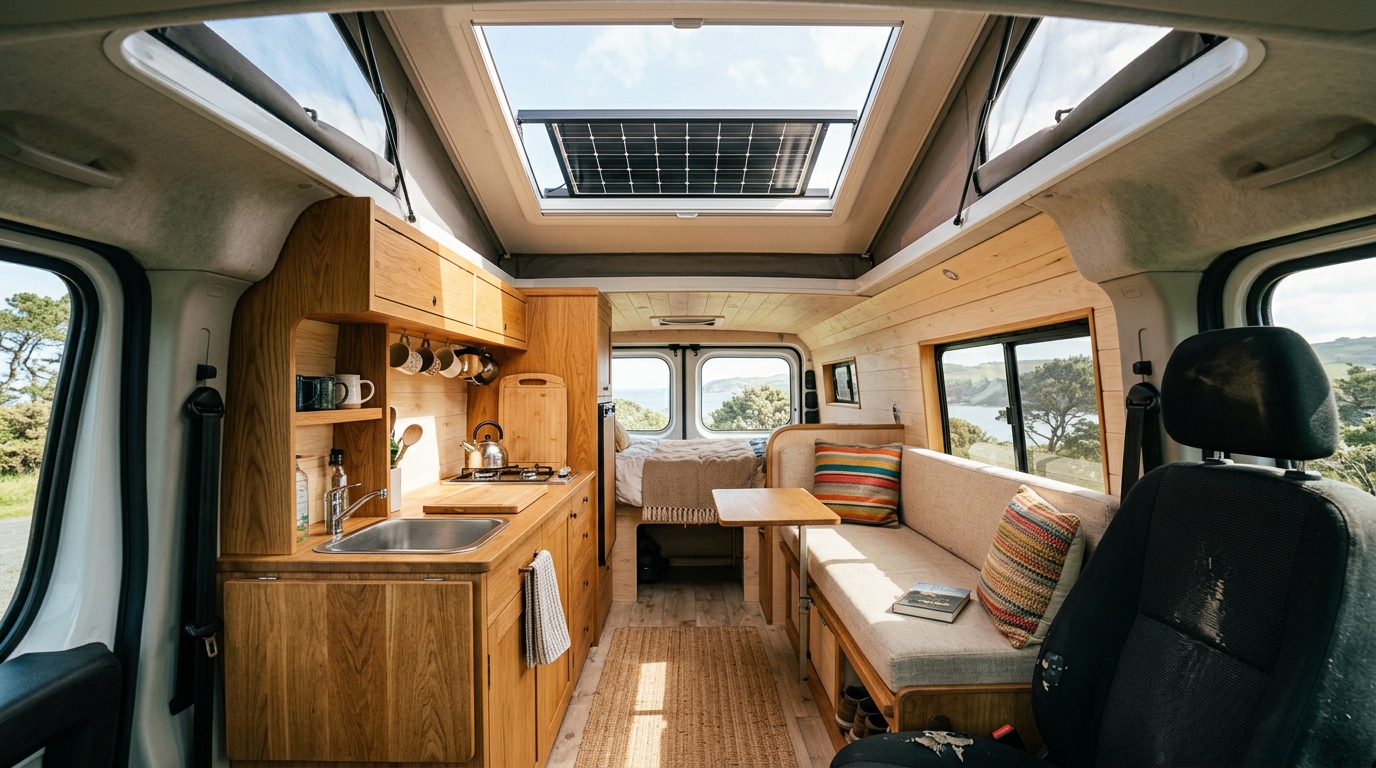
The upside: a well-built mobile solar system transforms van life and extended RV travel. No more hunting for hookup sites. No more running a generator at 6 AM and annoying your campground neighbors. Just quiet, free energy from the roof.
Sizing Your System: Vans vs. RVs
Before buying anything, figure out what you actually need to power. Mobile systems are smaller than residential ones, so every watt of consumption matters more.
Typical Daily Usage
Here’s what common van/RV loads actually draw over 24 hours, measured with a Victron BMV-712 battery monitor:
| Appliance | Typical Draw | Daily Hours | Daily Ah (at 12V) |
|---|---|---|---|
| Compressor fridge (Dometic/Isotherm) | 3-5A running, ~35% duty cycle | 24h (8.4h actual) | 25-42 Ah |
| LED lights (4 fixtures) | 1.5A total | 5h | 7.5 Ah |
| Laptop charging | 4-5A | 3h | 12-15 Ah |
| Phone charging (x2) | 1A | 4h | 4 Ah |
| Vent fan (Maxxair/Fan-tastic) | 1-3A | 8h | 8-24 Ah |
| Water pump | 4A | 0.25h | 1 Ah |
| Diesel heater (Webasto/Chinese) | 1-2A | 8h (winter) | 8-16 Ah |
Basic van setup (no AC): 40-60 Ah/day at 12V — roughly 500-720 Wh/day.
RV with residential fridge and entertainment: 80-150 Ah/day at 12V — roughly 1,000-1,800 Wh/day.
RV running a rooftop AC unit: Add another 80-120 Ah/day. This is where systems get expensive fast, and honestly, solar alone rarely handles AC in an RV. Most people supplement with shore power or a generator for air conditioning.
Use our Solar System Sizer to plug in your exact loads and get panel and battery recommendations.
Panel Sizing
A general rule: you need about 2x your daily watt-hour consumption in panel wattage to account for less-than-perfect sun, panel temperature derating, and charging losses.
| Use Case | Daily Wh | Panel Wattage | Panels Needed (200W) |
|---|---|---|---|
| Minimal van (fridge + lights) | 400-500 Wh | 200-300W | 1-2 |
| Typical van build | 500-720 Wh | 400-600W | 2-3 |
| Full-featured RV | 1,000-1,800 Wh | 800-1,200W | 4-6 |
| RV with AC | 2,000-3,500 Wh | 1,200-1,600W | 6-8 |
A common starting point is two 200W rigid panels, with a third added when winter production in northern climates doesn’t keep up with the fridge and heater. Three panels fit perfectly along most van roof lengths with room for a Maxxair fan.
Battery Sizing
For LiFePO4 (which is what you should use in a mobile build — weight alone justifies it), you can safely use 80-90% of rated capacity. I size my bank for 1.5-2x daily usage to have a comfortable buffer for cloudy days.
| Use Case | Daily Ah | Battery Bank |
|---|---|---|
| Minimal van | 35-45 Ah | 100-200 Ah |
| Typical van | 50-65 Ah | 200 Ah |
| Full-featured van | 60-80 Ah | 200-300 Ah |
| Full RV | 100-150 Ah | 300-400 Ah |
| RV with AC | 200+ Ah | 400-800 Ah |
Our Battery Bank Calculator handles the math including days of autonomy and depth-of-discharge limits.
Choosing Components
Panels: Rigid vs. Flexible
This is the first argument you’ll encounter on every van forum. Here’s the reality after watching both types perform on builds I’ve worked on and friends’ rigs.
Rigid panels are standard residential-style panels mounted on brackets or a roof rack. They’re heavier (typically 40-50 lbs for a 200W panel), but they produce more power, last longer, and run cooler because air circulates underneath them.
Flexible panels glue or stick directly to the roof surface. They’re lighter (8-12 lbs for a 200W panel) and very thin. They look cleaner. They also fail faster.
Flexible panels on a van roof run 15-30°F hotter than rigid panels with an air gap because there’s no ventilation underneath. That extra heat reduces output by 8-15% and degrades the cells and lamination faster. Flexible panels often start delaminating after 18 months on a dark van roof in hot climates. Rigid panels hold up well for years.
My recommendation: Use rigid panels mounted on crossbars or a low-profile rack. The weight penalty (maybe 80-100 lbs for a 400W array) is marginal compared to the lifespan and performance advantage. The only exception is if your van has a fiberglass roof that can’t support brackets, or if you’re building a stealth van where the panel profile matters for parking in urban areas.
Mounting Options
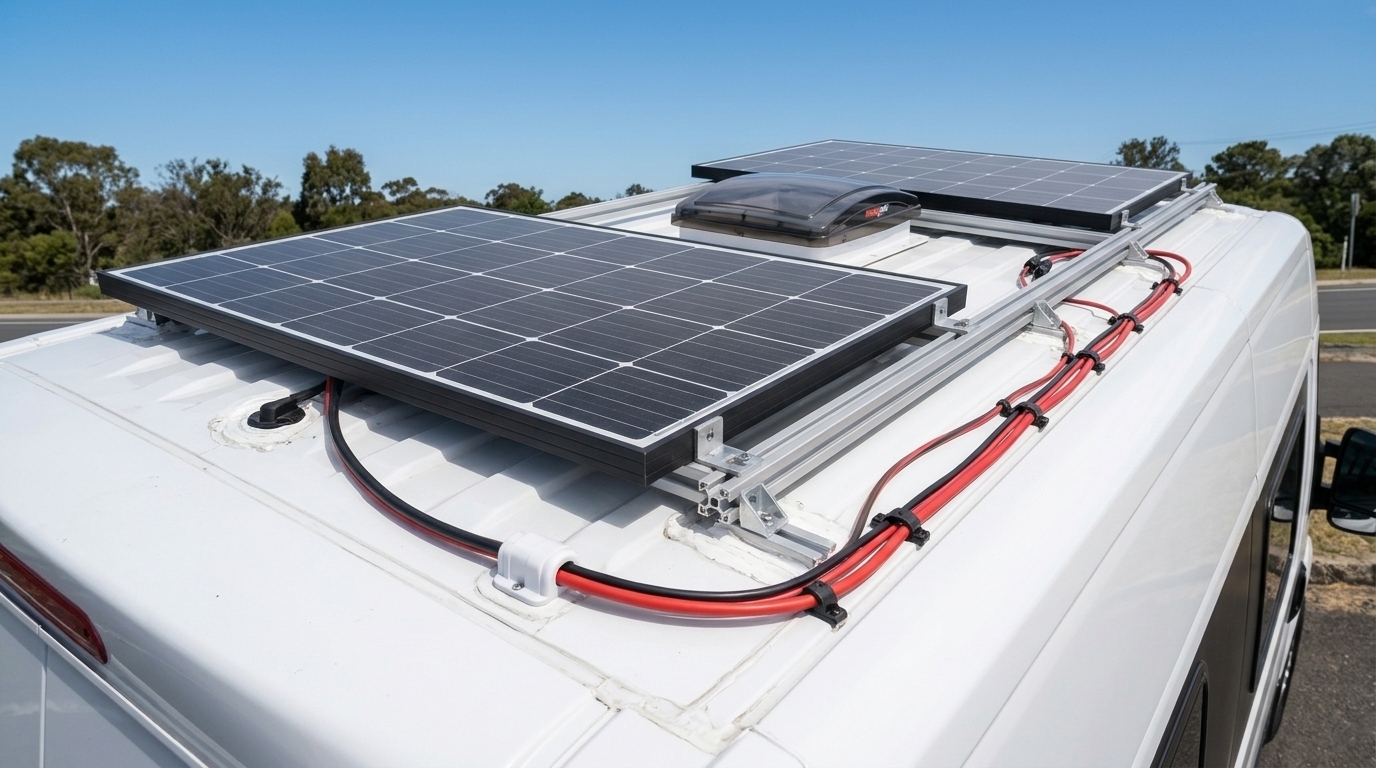
Crossbar/rack mount: Aluminum crossbars bolted through the roof (with proper sealant — more on that below) or clamped to existing rain gutters. This is the approach I recommend. The panels sit 1-2 inches above the roof, allowing air flow underneath. Z-brackets or L-brackets secure each panel to the crossbars.
Adhesive mount (flexible panels): VHB tape or Dicor lap sealant directly on the roof. Simpler install but permanent — you can’t easily reposition or replace panels. And if a flexible panel fails at year two, you’re scraping adhesive off your roof.
Tilt mount: Brackets that let you angle panels toward the sun when parked. Adds 15-30% production when tilted properly. The improvement is real on builds I’ve seen — but they add wind resistance and can’t be deployed while driving. If you’re mostly boondocking in one spot for days, worth considering. If you drive daily, skip it.
Roof penetrations: Yes, you’ll probably need to drill through your roof. Use stainless steel bolts, butyl tape under your mounting feet, and Dicor self-leveling lap sealant on top. This method is proven across countless van builds with zero leak issues when done properly. The key is butyl tape as the primary seal (it stays flexible and waterproof indefinitely) with Dicor as the secondary UV-resistant cap.
12V vs. 24V for Mobile Systems
Most vans stay 12V. Here’s why:
- Your vehicle’s electrical system is 12V, so a 12V house battery integrates with alternator charging and existing 12V accessories
- Most mobile appliances (compressor fridges, vent fans, LED lights, USB outlets) are 12V
- At the power levels typical in vans (200-800W solar, 100-300Ah batteries), the current levels are manageable with reasonable wire sizes
When 24V makes sense: Larger RVs with 1,000W+ solar arrays and 400Ah+ battery banks benefit from 24V because the current is halved. At 24V, a 2,000W array through an MPPT controller produces around 80A — manageable with 4 AWG wire. At 12V, that same power is 160A, requiring 2/0 AWG or larger. The tradeoff is you need 24V-to-12V converters for your 12V appliances, adding cost and complexity.
Most vans run 12V (600W panels, 200Ah battery) and it works fine. Larger Class A RVs with 1,600W and 800Ah often run 24V, where the wiring is much easier because of the lower currents.
For wire sizing in either configuration, our Wire Gauge Calculator accounts for voltage, current, and distance.
Battery Placement and Ventilation
LiFePO4 batteries don’t off-gas during normal operation (unlike lead-acid), so they don’t need external ventilation. But they do need protection from extreme temperatures.
Under-bed or under-seat mounting is the most common location in a van. The battery stays insulated from extreme cold by the vehicle’s interior heating and from extreme heat by being out of direct sun. Secure the battery with a strap or bracket rated for the battery’s weight — a 100Ah LiFePO4 12V battery weighs about 25 lbs, but a 200Ah unit is 50+ lbs. In a crash or hard stop, that’s a projectile.
Battery box: A marine-grade battery box bolted to the floor with the battery strapped inside is the way to go. Overkill? Maybe. But when you hit a pothole at 55 mph and everything in the van rearranges itself, the battery won’t move. Worth the extra $30 and 20 minutes.
Temperature considerations: LiFePO4 batteries cannot be charged below 32°F (0°C) without damage. If you’re a winter camper, either insulate your battery compartment, use a battery with built-in heating (EG4, Victron Smart, some SOK models), or set your charge controller’s low-temperature cutoff. In cold-weather camping, an under-bed battery with a diesel heater keeping the cabin warm rarely drops below 45°F.
For a deep look at LiFePO4 battery options and how to build a bank from raw cells, see our complete LiFePO4 battery bank guide.
Shore Power and Alternator Charging
Solar alone is your primary charging source, but smart mobile builds include backup charging for cloudy stretches and driving days.
DC-DC Charger (Alternator Charging)
A DC-DC charger (also called a battery-to-battery charger) takes power from your vehicle’s alternator and properly charges your house battery while driving. This is different from simply connecting your house battery to the vehicle battery with an isolator — a DC-DC charger provides a proper multi-stage charge profile.
Popular options:
- Victron Orion-Tr Smart 12/12-30 (30A, ~$180): What I use. Bluetooth monitoring, programmable, excellent build quality.
- Renogy 40A DC-DC (~$160): Slightly more amps for less money, also works well.
- Sterling B2B 1260 (60A, ~$350): For larger systems that want maximum alternator charging speed.
At 30A and 12V, the Victron Orion puts about 360W into the house battery while driving. Over a 4-hour drive, that’s 1.4 kWh — roughly equivalent to a typical daily solar harvest on a decent day. Between solar and alternator charging, many van lifers report never dropping below 40% battery.
Installation tip: Run the thickest reasonable wire from the vehicle battery to the DC-DC charger (4 AWG minimum for 30A runs over 10 feet). Fuse both ends — at the vehicle battery and at the DC-DC charger input. The alternator wire route usually runs through the firewall and under the vehicle. Use split loom and grommets everywhere metal edges could chafe the insulation.
Shore Power Charger
When you plug into a campground’s 30A or 15A outlet, a shore power charger (AC-DC converter) charges your house battery from grid power.
You can use a standalone charger like the Victron Blue Smart IP67 (which is waterproof and can mount in a wet bay) or combine inverter and charger in one unit. Many 12V inverter/chargers handle both functions — the Victron MultiPlus 12/1200 is the classic choice, though at $600+ it’s not cheap.
I keep it simple: a $120 NOCO Genius 30A charger mounted near the battery, connected to a 15A inlet on the outside of the van. I plug in maybe twice a month at a friend’s house or paid campsite. The rest of the time, solar and alternator handle everything.
Wiring Your Mobile Solar System
Wiring a vehicle is different from wiring a house. Everything moves, vibrates, and gets hot.
Routing Cables
From roof panels to interior: Drill an entry point (usually through the roof near the rear, or through a side wall behind trim). Use a waterproof cable gland — I like the ones from Renogy or generic IP68 glands from Amazon. Apply butyl tape around the gland before tightening, then seal with Dicor on top.
Interior routing: Run cables through existing wire chases if your vehicle has them, or create a dedicated channel along the wall behind trim panels. Use adhesive-backed cable clips every 12 inches. Every wire should be secured — loose wires vibrate, rub, and eventually short against metal body panels.
Connections: Use ring terminals with heat-shrink insulation for all battery and busbar connections. I crimp with a hydraulic crimper and verify every connection with a pull test. Solder is NOT appropriate for mobile DC connections — it wicks under vibration and creates a brittle failure point. Crimp only.
For help sizing every wire run in your system, use the Wire Gauge Calculator and reference our wire gauge chart.
Panel Wiring: Series vs. Parallel
For mobile installations, panel wiring configuration matters more than residential because shade patterns change constantly as you park in different orientations.
Series wiring: Higher voltage, lower current. One shaded panel drags down the entire string. Better for long wire runs where you want to minimize current and use thinner wire.
Parallel wiring: Same voltage, additive current. Shade on one panel doesn’t affect others. Better for partial shade situations, which are extremely common in mobile installations (tree branches, other vehicles, rooftop equipment casting shadows).
My recommendation for vans: Wire panels in parallel if you have 2-3 panels of the same type. The partial shade advantage is significant for mobile use. If you have 4+ panels and an MPPT controller with enough input voltage headroom, consider two series pairs wired in parallel (2S2P) — this gives you some voltage boost for the MPPT controller while maintaining shade tolerance between the pairs.
Read the full breakdown of series vs. parallel tradeoffs in our panel wiring guide.
Fusing and Protection
Mobile systems need more protection than stationary ones because vibration can loosen connections over time.
- Main battery fuse: Within 12 inches of the battery positive terminal. Class T or ANL fuse. Size for your maximum total load (inverter + charger + DC loads).
- Charge controller fuse: On both battery and panel sides.
- Inverter fuse: Separate fuse between battery and inverter, sized for the inverter’s maximum draw.
- DC distribution fuse box: I use a Blue Sea ST Blade fuse block for all 12V DC loads. Each circuit gets its own appropriately sized fuse.
- Bus bars: Positive and negative bus bars centralize your connections and make troubleshooting easier. Mount them in an accessible location — you will need to check connections periodically.
A Complete Van Build Example
Here’s a typical Ford Transit van build I’ve worked on, with approximate costs:
| Component | Spec | Cost |
|---|---|---|
| Solar panels | 3x 200W Newpowa rigid mono | $330 |
| Mounting | Aluminum crossbars + Z-brackets | $120 |
| Charge controller | Victron SmartSolar 100/30 | $180 |
| Battery | 2x LiTime 12V 100Ah in parallel (200Ah) | $400 |
| Inverter | Victron Phoenix 12/1200 (pure sine) | $280 |
| DC-DC charger | Victron Orion-Tr Smart 12/12-30 | $180 |
| Shore charger | NOCO Genius GEN5X1 (30A) | $120 |
| Battery monitor | Victron BMV-712 | $150 |
| Fuses/breakers | ANL fuses, Blue Sea fuse block, bus bars | $120 |
| Wire + connectors | 4 AWG, 8 AWG, 12 AWG, ring terminals, MC4 | $150 |
| Miscellaneous | Cable glands, butyl tape, Dicor, split loom, clips | $60 |
| Total | $2,090 |
This type of system requires minimal maintenance — the occasional fuse replacement and periodic terminal re-torquing. Otherwise it runs hands-free.
On a sunny summer day in the northeast, expect 1.2-1.6 kWh from a 600W array. In December, that drops to 0.3-0.6 kWh. The alternator charger fills the gap on driving days, and shore power covers the rare cloudy week where you’re parked in one spot.
Use the Cost Estimator to build out your own component list and budget.
Tips from Real-World Van Solar Builds
A few things I’ve picked up from builds I’ve worked on that aren’t in most guides:
Park facing south when possible. Obvious but easy to forget. At a free campsite, circle the lot once looking for a south-facing spot with minimal overhead shade. The difference between a south-facing park and a north-facing one under trees is easily 50% more daily harvest.
Clean your panels. Road grime, bird droppings, and tree sap accumulate fast on a vehicle that moves daily. Wipe your panels with a damp microfiber cloth every week or two. On builds I’ve checked, panels were down 10-15% from a layer of road film the owner hadn’t noticed.
Monitor your battery state of charge. A battery monitor (Victron BMV-712, or the Bluetooth-equipped battery’s built-in monitor) is not optional. Without it, you’re guessing how much energy you have left. Check it twice a day — morning and evening — and adjust usage if you’re trending toward a low state of charge.
Carry a portable panel. If a full built-in system feels like too much for your use case, our portable power stations vs DIY comparison covers when a sealed unit is the smarter call. A folding 100W panel is a great backup. When parked under a tree canopy (for shade in summer), set the portable panel in a sunny clearing nearby and run an extension cable to the charge controller. It’s ugly but effective.
Don’t forget the parasitic draw. Your charge controller, battery monitor, CO detector, and any always-on electronics draw power 24/7. A typical system’s parasitic draw is about 0.3-0.5A at 12V. That sounds tiny, but 0.4A over 24 hours is 9.6 Ah/day — nearly 70 Ah over a week of sitting idle. Measure yours by disconnecting all loads and watching the battery monitor.
Vibration-proof everything. Nyloc nuts on every bolt. Blue thread locker on every screw into metal. Battery straps, not just battery boxes. Cable clips every 12 inches. I once found a ring terminal that had vibrated half-off a bus bar stud after 6 months — it was arcing and scorching the plastic insulator. Now I torque-check every connection during oil changes.
Mobile solar shifts the RV and van experience from “finding hookups” to “finding views.” The upfront cost is real, but the freedom pays it back within a year or two of regular use. Start with an honest assessment of your power needs, buy quality components, and take the time to wire it right.
Frequently Asked Questions
How many watts of solar do I need for my van?
Most vans need 200-600W of solar panels. A basic setup (fridge + lights) needs 200-300W. A typical build with laptop charging, vent fan, and fridge needs 400-600W. RVs running an AC unit need 1,200-1,600W.
Should I use rigid or flexible solar panels on my van?
Rigid panels outperform flexible panels in every measurable way except weight. Flexible panels run 15-30 degrees F hotter without airflow underneath, reducing output 8-15% and causing delamination within 18 months in hot climates. Use rigid panels on crossbar mounts whenever possible.
Can I run an air conditioner on van solar?
Solar alone rarely handles AC in an RV. A rooftop AC unit adds 80-120Ah/day to your 12V load, requiring 1,200-1,600W of panels and 400-800Ah of batteries. Most people supplement with shore power or a generator for air conditioning.
How big a battery do I need for van life?
A 200Ah LiFePO4 battery at 12V provides roughly 2.4 kWh of usable energy — enough to run a compressor fridge, LED lights, a laptop, and a vent fan for a full day. Most full-time van builds use 200-300Ah.
Should I solder or crimp wire connections in a van?
Always crimp, never solder. Solder wicks under vibration and creates brittle failure points in mobile installations. Use ring terminals with heat-shrink insulation, crimped with a hydraulic crimper, and verify every connection with a pull test.
Anthony
Solar homeowner, EV driver, and DIY builder. Using solar to power a large part of my home.
Get build guides in your inbox
Weekly solar builds, product tests, and technical deep-dives.
Subscribe Free